

Toll Free: 1800 3000 6222
Telephone: +91 141 222 3221
Fax: +91 141 222 1926, 222 2259
CIN: U29130WB1946PLC013643
Founded in 1946, National Engineering Industries Ltd (NEI) is India’s leading bearings manufacturer and exporter, renowned for excellence in quality and delivery.

Electronics assembly is becoming more demanding, even on a small workbench. SEMI reported that worldwide sales of semiconductor manufacturing equipment reached $117.1 billion in 2024, a 10% increase over 2023. That figure covers factory equipment, not hobbyist or repair-bench Smd Tools, but it signals the scale of investment behind increasingly compact electronics. Smaller components leave less room for imprecise handling. A misplaced 0402 resistor can disappear under a microscope, while excess heat can lift a copper pad from a board. Tiny parts. Real consequences.
This 2026 guide compares Smd Tools for practical assembly and rework, including temperature-controlled soldering irons, hot-air stations, fine tweezers, microscopes, and fume extraction. IPC workmanship standards offer useful benchmarks for solder-joint quality, but a standard cannot tell you whether a particular tool feels balanced after an hour of use. That takes hands-on testing—and even careful testing has limits. Our recommendations weigh temperature stability, tip availability, ergonomics, repair support, and value, rather than relying on headline wattage alone. A cheaper station may work well, until replacement tips become hard to find. Tool choice also depends on the board, component size, and operator experience. There is no perfect kit. Expect trade-offs, and verify specifications with manufacturers before buying.
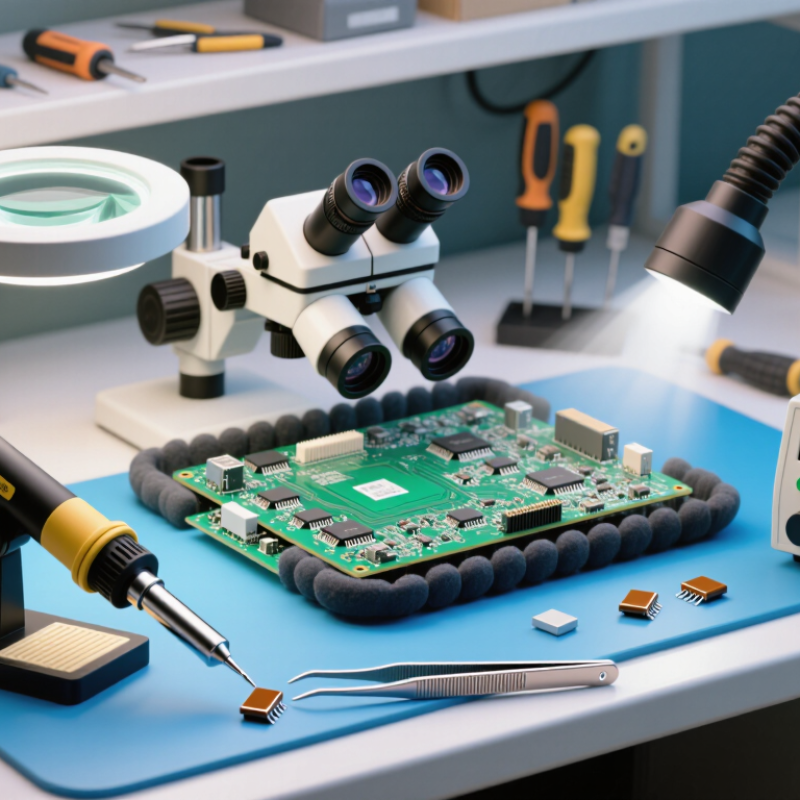
Surface-mount device (SMD) tools support each step between loose components and a tested circuit board. Tweezers and a magnifier help position tiny parts; solder paste, a stencil, and a controlled heat source create electrical and mechanical connections. For rework, hot air and a temperature-controlled iron can remove or replace components without disturbing nearby joints. Inspection tools matter too: a bright light and microscope can reveal lifted pads, solder bridges, or misaligned leads. The right setup depends on component size, board density, and production volume—not simply the number of tools on the bench.
This work has growing industrial relevance. The Semiconductor Industry Association, citing WSTS, reported global semiconductor sales of $627.6 billion in 2024. That figure describes the component market, not SMD-tool demand, but it signals the scale of electronics flowing into assembly. In practice, even a small placement error can waste a costly component or delay a board. Hand tools suit prototypes and repairs; stencils and repeatable heating processes help improve consistency across batches. Still, no tool compensates for poor process control. That part is easy to underestimate.
Tips: Match the tool to the component’s package and thermal needs. Use fine, ESD-safe tweezers for small parts, and check tip temperature against the component datasheet. Inspect one test joint before repeating the process. Keep notes; memory is not a process control system.

2026 Best SMD Tools for Electronics Assembly?
How to Choose SMD Tools for Different Assembly Tasks
Choosing SMD tools starts with the board, not the tool catalog. For hand assembly, inspect component size, pad spacing, and board quantity. Fine-point tweezers help place 0201 parts, while a wider tip suits larger packages. A temperature-controlled soldering iron handles occasional repairs; hot air is useful for removing multi-lead parts. Small details matter: keep parts in labeled trays, and check magnification before soldering. Your eyes tire faster than you expect.
For repeatable paste application, a stencil and squeegee can improve consistency. A benchtop reflow oven is more practical than hot air when assembling several boards with many components. Match the heating profile to the solder paste manufacturer’s guidance, and verify it with a thermocouple on a test board. Grand View Research estimated the global surface-mount technology equipment market at USD 5.06 billion in 2023, reflecting broad investment in automated assembly. That market figure is context, not a buying rule: a small repair bench rarely needs production-scale equipment.
Choose inspection tools for the defects you need to catch. A stereo microscope can reveal shifted parts and solder bridges; a multimeter checks continuity and shorts. For prototypes, prioritize adjustable lighting, stable workholding, and easy-to-clean tips over impressive specifications. IPC’s J-STD-001 and IPC-A-610 provide widely used soldering and acceptability criteria, but tools alone do not ensure compliant workmanship. There is a trade-off: inexpensive equipment may work well, yet inconsistent temperature control can waste components. Test your setup on a spare board.
Small SMD parts are easy to lose and surprisingly easy to damage. A pair of fine, ESD-safe tweezers gives better control when placing resistors or lifting a component after desoldering. Choose tips that meet cleanly without a visible gap. I learned that slightly bent tips can turn a simple placement into a frustrating chase across the workbench.
A temperature-controlled soldering iron with a narrow tip helps reach closely spaced pads. Keep the tip clean, and use only enough solder to form a small, shiny joint. For rework, hot air can loosen multi-lead components evenly, but airflow matters: too much can shift nearby parts. Practice on a scrap board first. It is not glamorous, but it saves good assemblies.
Add a magnifier or inspection lamp, fine solder, flux, and a solder wick to your bench. Flux helps solder flow; wick removes excess from bridged pads. A small vacuum pickup tool can place tiny parts more steadily than tweezers, though it may feel awkward at first. Keep tools organized, inspect tips for wear, and let the board cool before handling. Even careful work can leave a weak joint, so check under magnification and test the circuit before calling the repair complete.
Typical starting temperature ranges for common SMD soldering and rework tools (°C).
Ranges are indicative, not universal specifications. Actual settings depend on the solder alloy, component, board design, and tool; follow component guidance and validate settings on the assembly.
The best SMD tool set depends on what you assemble, how often you work, and how steady your hands feel after an hour. For occasional repairs, start with fine ESD-safe tweezers, a temperature-controlled soldering iron, and magnification that lets you inspect tiny joints without leaning close. A stereo microscope is useful for repeated inspection; a well-lit magnifier may be enough for simple boards. If you place many components, add a solder-paste stencil and a controlled reflow method. Hot air is flexible, but it can shift small parts when airflow is poorly adjusted.
Experience matters. Beginners often benefit more from stable lighting, a comfortable bench, and reliable temperature control than from specialized placement equipment. Experienced assemblers may save time with a vacuum pickup tool or programmable paste dispenser. Deloitte and the Manufacturing Institute estimated that 1.9 million U.S. manufacturing jobs could go unfilled by 2033. That workforce concern makes training and easy-to-use tools practical priorities, not luxuries. Still, the estimate covers manufacturing broadly, not electronics assembly alone.
Tips: Match the tool to the task. Test hot-air settings on a scrap board before working on a finished product. Check that the tip reaches small pads without blocking your view. And be honest about your workflow: a costly tool can sit unused. I learned that the hard way. Sources: Deloitte and The Manufacturing Institute, 2024 manufacturing workforce study; IPC assembly workmanship guidance.
Match surface-mount device (SMD) tools to your workflow, board complexity, and experience level.
| Tool | Best For | Skill Level | Typical Workflow | Key Selection Criteria | Practical Considerations |
|---|---|---|---|---|---|
| ESD-safe fine-tip tweezers | Placing chips, resistors, capacitors, and small connectors | Beginner to advanced | Hand placement before soldering or rework | Choose straight or angled tips that align with component size; check that the tips meet evenly. | Use grounded, ESD-safe tools when handling static-sensitive parts. Fine tips can bend if used to pry components. |
| Temperature-controlled soldering station | Prototypes, repairs, and through-hole work alongside SMD assembly | Beginner to advanced | Hand-soldering pads, wires, and larger SMD components | Look for stable temperature control, replaceable tips, suitable tip options, and readily available replacement parts. | A small chisel tip often transfers heat more effectively than an extremely fine tip. Use a temperature appropriate to the solder and component. |
| Hot-air rework tool | Removing or installing multi-lead and leadless SMD packages | Intermediate to advanced | Localized component rework after applying suitable flux | Consider adjustable airflow, temperature control, nozzle options, and a stable holder. | Airflow can shift nearby small parts. Shield adjacent components and avoid heating a board longer than necessary. |
| Magnification lamp or inspection microscope | Inspecting fine-pitch leads, solder joints, and small components | All levels | Placement checks and post-solder inspection | Prioritize comfortable working distance, clear focus, adequate lighting, and a view that suits the board size. | Magnification helps reveal bridges and poor joints, but excessive magnification can make general positioning less comfortable. |
| Stencil and solder-paste applicator | Repeatable paste application on prototype or small-batch boards | Beginner to advanced | Apply paste through stencil apertures before component placement | Match the stencil thickness and aperture design to the PCB footprint and component requirements. | Keep the stencil aligned and clean. Paste consistency, storage, and working time affect print quality. |
| Reflow oven or controlled hot plate | Assembling boards with multiple SMD components | Intermediate | Heat solder paste through a controlled reflow cycle | Check usable board area, temperature control, repeatability, and compatibility with the solder-paste profile. | Follow the solder-paste manufacturer’s recommended thermal profile. Monitor board temperature rather than relying only on a heater setting. |
| Fume extraction system | Reducing exposure to fumes during soldering and rework | All levels | Operate near the work area during soldering and heating | Consider airflow, filter type, filter replacement availability, and whether the intake can be positioned close to the work. | Extraction should capture fumes at the source. It does not replace good ventilation or safe handling practices. |
| Digital multimeter | Checking continuity, resistance, and power rails after assembly | Beginner to advanced | Pre-power checks and fault finding | Choose suitable measurement ranges, clear continuity indication, and probes that can safely contact small test points. | Verify power and polarity before energizing a new board. Avoid probing adjacent fine-pitch pins in a way that could create a short. |
Workflow tip: A basic hand-assembly setup typically starts with ESD-safe tweezers, a temperature-controlled soldering station, magnification, a multimeter, and fume extraction. Add paste printing and reflow equipment when assembling boards with many SMD parts or repeating the same build.
Copyright © 2023 NEI Ltd. All rights reserved.
Registered Office : 9/1, R. N. Mukherjee Road, Kolkata – 700 001. In case of any queries or grievances, please contact Mr.Tarun Kumar Kabra, Company Secretary.
E-mail: sale@kinpart.com Privacy Policy Cookie Policy