How to Choose the Right Wall Hole Saw?
Choosing the right Wall Hole Saw is more than matching a diameter to a pencil mark. The wall may contain plaster, brick, concrete block, wood studs, insulation, pipes, or hidden wiring. Each material demands a different cutting approach. A tool that works smoothly on drywall can overheat quickly against masonry. That difference matters.
Years of practical installation work show how small choices affect the final opening. Tooth design, cutting depth, arbor strength, and pilot-bit stability all influence control. For example, a diamond-grit hole saw can handle some masonry applications, while hardened teeth suit wood or softer wallboard. The correct diameter should also allow room for the pipe, cable, or fitting without leaving an unnecessarily large gap. Measure twice.
This guide explains how to compare Wall Hole Saw types, sizes, materials, and compatible drills. It also considers dust control, heat buildup, vibration, and access around the work area. These details often receive less attention than the blade itself. That is a mistake. A clean pilot hole may prevent wandering, yet it cannot compensate for the wrong cutting speed or an unsuitable saw. Even experienced users occasionally choose convenience over precision. The goal here is not to promote one universal tool, but to support a safer, more informed selection. Real walls are rarely perfect, and tool performance can vary with pressure, age, and surface condition. A careful assessment remains essential.
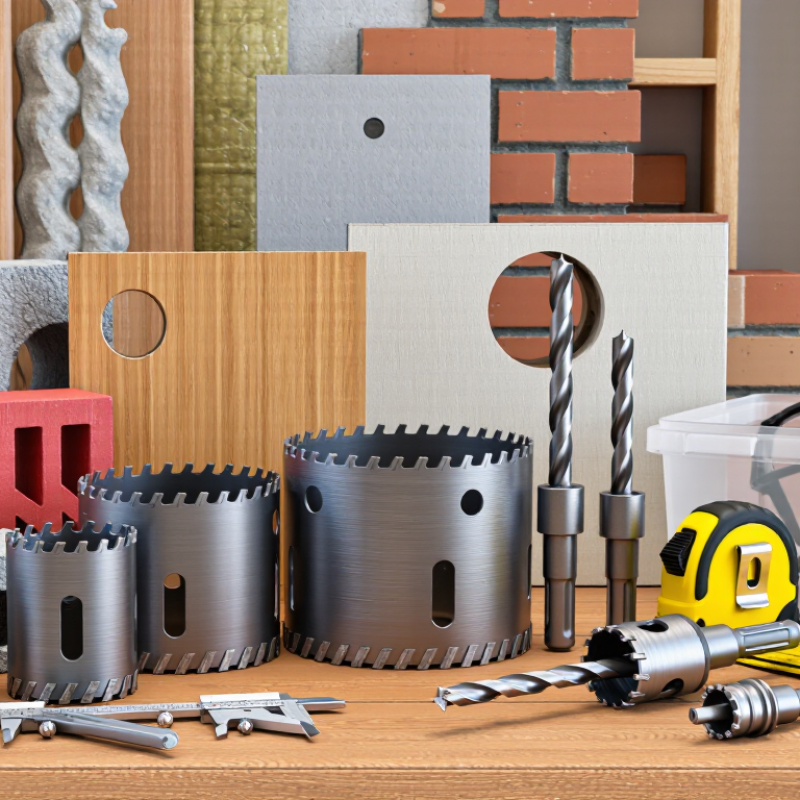
Define the Wall Material and Identify Hidden Utilities Before Cutting
How to Choose the Right Wall Hole Saw?
Define the Wall Material and Identify Hidden Utilities Before Cutting
Choosing a wall hole saw begins with identifying the wall, not measuring the opening. Drywall cuts easily, but plaster may crumble around the edge. Brick and concrete require a stronger cutting method and steady pressure. Ceramic tile needs a suitable grit and slower drilling speed. Metal surfaces demand a hole saw designed for metal, with proper cooling when necessary.
Inspect the area from both sides whenever possible. Check construction drawings, electrical plans, and plumbing routes before marking the center. A wall scanner can locate wiring, pipes, and framing, but it is not infallible. I once trusted a clean scan too quickly; that confidence was misplaced. Scan repeatedly from different directions. Then make a small inspection opening where practical.
Turn off nearby electrical circuits before cutting. Do not cut when a hidden utility remains possible. Stop immediately if you meet unexpected resistance, heat, moisture, or a metallic sound. These signs may indicate a pipe, cable, reinforcement, or structural component. Never enlarge an opening near a suspected load-bearing element without qualified advice. The right hole saw also depends on depth, diameter, dust control, and the drill’s capacity. A neat edge is useful, but confirmed conditions matter more. Safety glasses and respiratory protection are sensible, even during a short cut.
How to Choose the Right Wall Hole Saw
Define the wall material and identify hidden utilities before cutting. The chart shows representative thicknesses for common wall materials, helping you estimate cutting depth and select an appropriate hole-saw type.
Typical values shown: gypsum board 12.5 mm, half-inch drywall 12.7 mm, plywood sheathing 12 mm, brick veneer 90 mm, and concrete 100 mm. Actual wall assemblies vary. Before drilling, use approved detection methods to check for electrical cables, plumbing, gas lines, and structural elements. Choose a bit designed for the confirmed material, and never rely on the hole saw alone to detect hidden utilities.
Select M42 Bi-Metal Teeth with 8% Cobalt for Wood, Plastic, and Metal
How to Choose the Right Wall Hole Saw?
Select M42 Bi-Metal Teeth with 8% Cobalt for Wood, Plastic, and Metal
Choosing a wall hole saw starts with the material, diameter, and cutting depth. For mixed jobs, M42 bi-metal teeth with 8% cobalt offer a practical balance of toughness and heat resistance. The cobalt content helps the teeth stay harder during demanding cuts. It does not make the saw indestructible.
In wood, these teeth can cut through studs, panels, and laminated boards with controlled pressure. Plastic requires a slower feed to reduce melting around the hole. For thin steel or aluminum, apply suitable cutting fluid and keep the saw aligned. Let the teeth cut. Do not force them.
I have found that a sharp pilot drill improves accuracy, especially on smooth wall surfaces. A stable arbor also reduces vibration and uneven tooth wear. Check the saw’s cutting depth before starting. A deep wall cavity can trap dust and heat. Clear debris regularly.
Keep it steady.
Tooth condition matters more than appearance. A saw may look usable but cut poorly after repeated metal work. I once pushed a worn hole saw too hard, leaving a rough edge and overheating the workpiece. That mistake showed me why moderate speed and short pauses matter. For occasional wood-only projects, a different tooth design may be more economical. M42 bi-metal construction is most useful when one tool must handle changing materials.
Choose Diamond Grit for Tile and Masonry; Use 250–1,000 RPM
How to Choose the Right Wall Hole Saw?
Choosing a wall hole saw starts with the material, not the hole size. For tile, brick, concrete, or stone, diamond grit usually gives cleaner, steadier cutting. Its abrasive edge works through hard surfaces without relying on large teeth. I have found that a sharp diamond rim reduces chipping around bathroom fittings. It still needs patience.
Keep the drill between 250 and 1,000 RPM. Start near the lower end on glazed tile, then increase speed only when the cut stays stable. Excessive speed can overheat the rim, damage the tile, or create rough edges. A slower start also helps prevent the bit from skating across the surface. I sometimes use a guide, but careful hand positioning can work too.
Tips: Mark the center clearly and check for hidden pipes or cables before drilling. Use light pressure and let the abrasive edge do the work. Cooling the cutting area with water can extend tool life, but keep water away from electrical connections. Wear eye protection and control dust with suitable ventilation. Measure twice. The first hole is rarely the one to practice on.
How to Choose the Right Wall Hole Saw? - Choose Diamond Grit for Tile and Masonry; Use 250–1,000 RPM
Material-based selection guide for wall hole saws | Wall Material | Recommended Hole Saw | Typical Diameter Range | Suggested Speed | Drilling Method | Cooling Requirement | Key Safety and Performance Notes |
| Ceramic Wall Tile | Diamond-grit hole saw | 6–100 mm | 400–1,000 RPM | Start at an angle or use a guide; level the tool after the rim engages | Use continuous water cooling when permitted by the tool and work area | Do not use hammer action. Reduce pressure as the cut nears breakthrough to limit chipping. |
| Porcelain Tile | High-quality diamond-grit hole saw | 6–100 mm | 250–600 RPM | Use light, steady pressure with a rigid guide or template | Continuous water cooling is strongly recommended | Porcelain is dense and brittle. Avoid excessive force, dry overheating, and impact mode. |
| Brick and Soft Masonry | Diamond-grit or carbide-grit masonry hole saw | 25–150 mm | 250–600 RPM | Keep the drill aligned and allow the cutting edge to remove material gradually | Dry cutting may be possible if the tool is rated for it; control dust with suitable extraction | Check for concealed wiring and plumbing. Use hammer action only if the hole saw manufacturer allows it. |
| Concrete and Dense Block | Diamond-grit core-style hole saw | 25–200 mm | 250–500 RPM | Use a stable guide or stand; maintain a straight axis | Wet cutting helps control heat and dust; use appropriate slurry management | Use a tool and arbor designed for concrete. Avoid hand-held drilling if the setup cannot control reaction torque. |
| Plasterboard / Drywall | Bi-metal hole saw or standard toothed hole saw | 25–150 mm | 500–1,000 RPM | Drill steadily with minimal pressure | Normally no water; use dust collection where practical | Teeth provide fast cutting in thin board. Support the back of the panel when possible to reduce tearing. |
| Wood Stud or Timber Wall | Bi-metal or carbon-steel toothed hole saw | 25–150 mm | 500–1,000 RPM | Use a pilot bit and keep the drill square to the surface | Dry cutting | Inspect for nails, screws, cables, and pipes before cutting. Withdraw periodically to clear chips. |
| Tile over Backer Board | Diamond-grit hole saw for the tile, followed by a suitable cutter for the board | 6–100 mm | 250–600 RPM | Cut through the tile first, then match the speed and method to the substrate | Water cooling for the tile; keep moisture away from electrical components | Changing substrate can alter cutting resistance. Do not force the saw after it passes through the tile. |
Match Hole Diameter and Depth to the Installation’s Measured Clearance
How to Choose the Right Wall Hole Saw?
Measure the installation clearance before choosing a wall hole saw. Do not rely on a guessed pipe or fitting size. Measure the widest section that must pass through the wall. Then add only the clearance required by the installation instructions. Too much extra space can weaken the surface or leave an unattractive gap. Too little space can damage the fitting during insertion.
Depth matters just as much as diameter. Check the wall layers, including paint, tile, plasterboard, and backing material. Select a hole saw with enough cutting depth to pass through these layers cleanly. However, avoid cutting deeply into an unknown cavity. Electrical cables, plumbing, or framing may be nearby. I have seen installers measure the front surface carefully but forget a thick tile layer. The result was an incomplete opening.
Use a tape measure, caliper, or depth gauge where possible. Mark the center with a visible cross, then confirm the measurement from both sides if access allows. A small test cut in scrap material can reveal whether the saw diameter is practical. It may feel unnecessary. It often prevents rework. The first measurement is not always right. Recheck it when the wall surface is uneven, and allow for the saw’s actual kerf rather than its labeled diameter.
Verify Arbor Compatibility, Pilot-Drill Size, and ANSI-Rated Safety Gear
How to Choose the Right Wall Hole Saw?
A wall hole saw is only as reliable as its arbor connection. Check the arbor’s shank type, thread pattern, maximum diameter, and locking method. The saw must sit squarely, without rocking. A loose arbor can create wobble, chipped masonry, or a broken pilot drill.
Confirm the pilot-drill size in the arbor’s technical sheet. Do not assume every replacement drill fits. Different arbor systems use different diameters and lengths. I have seen installers choose a larger pilot bit for faster cutting, then lose control when the saw bites. Faster is not always safer.
Wall material changes the risk. For concrete, brick, or cement board, use eye protection compliant with ANSI/ISEA Z87.1-2020. Add hearing protection, gloves suited to the task, and suitable respiratory protection when dust is generated. OSHA’s respirable crystalline silica standard sets an action level of 25 micrograms per cubic meter and a permissible exposure limit of 50 micrograms over eight hours. Dust control matters, especially during repeated drilling. A vacuum attachment or controlled wet method may help, if the tool instructions permit it.
Tips: Test the arbor and pilot drill on scrap material. Mark the hole center clearly. Start at low speed. Keep both hands stable. Recheck the pilot after several holes. This small inspection is easy to skip, and that is the mistake worth reconsidering. Stop if the arbor heats excessively, the pilot bends, or the saw begins to chatter. ANSI/ISEA 105 can also guide glove selection, but cut resistance alone does not prevent vibration injuries.